This massive, versatile, powerful drone is the only thing you'll need in survival mode. It has a bunch of features, making your life a lot easier.
Basic Info
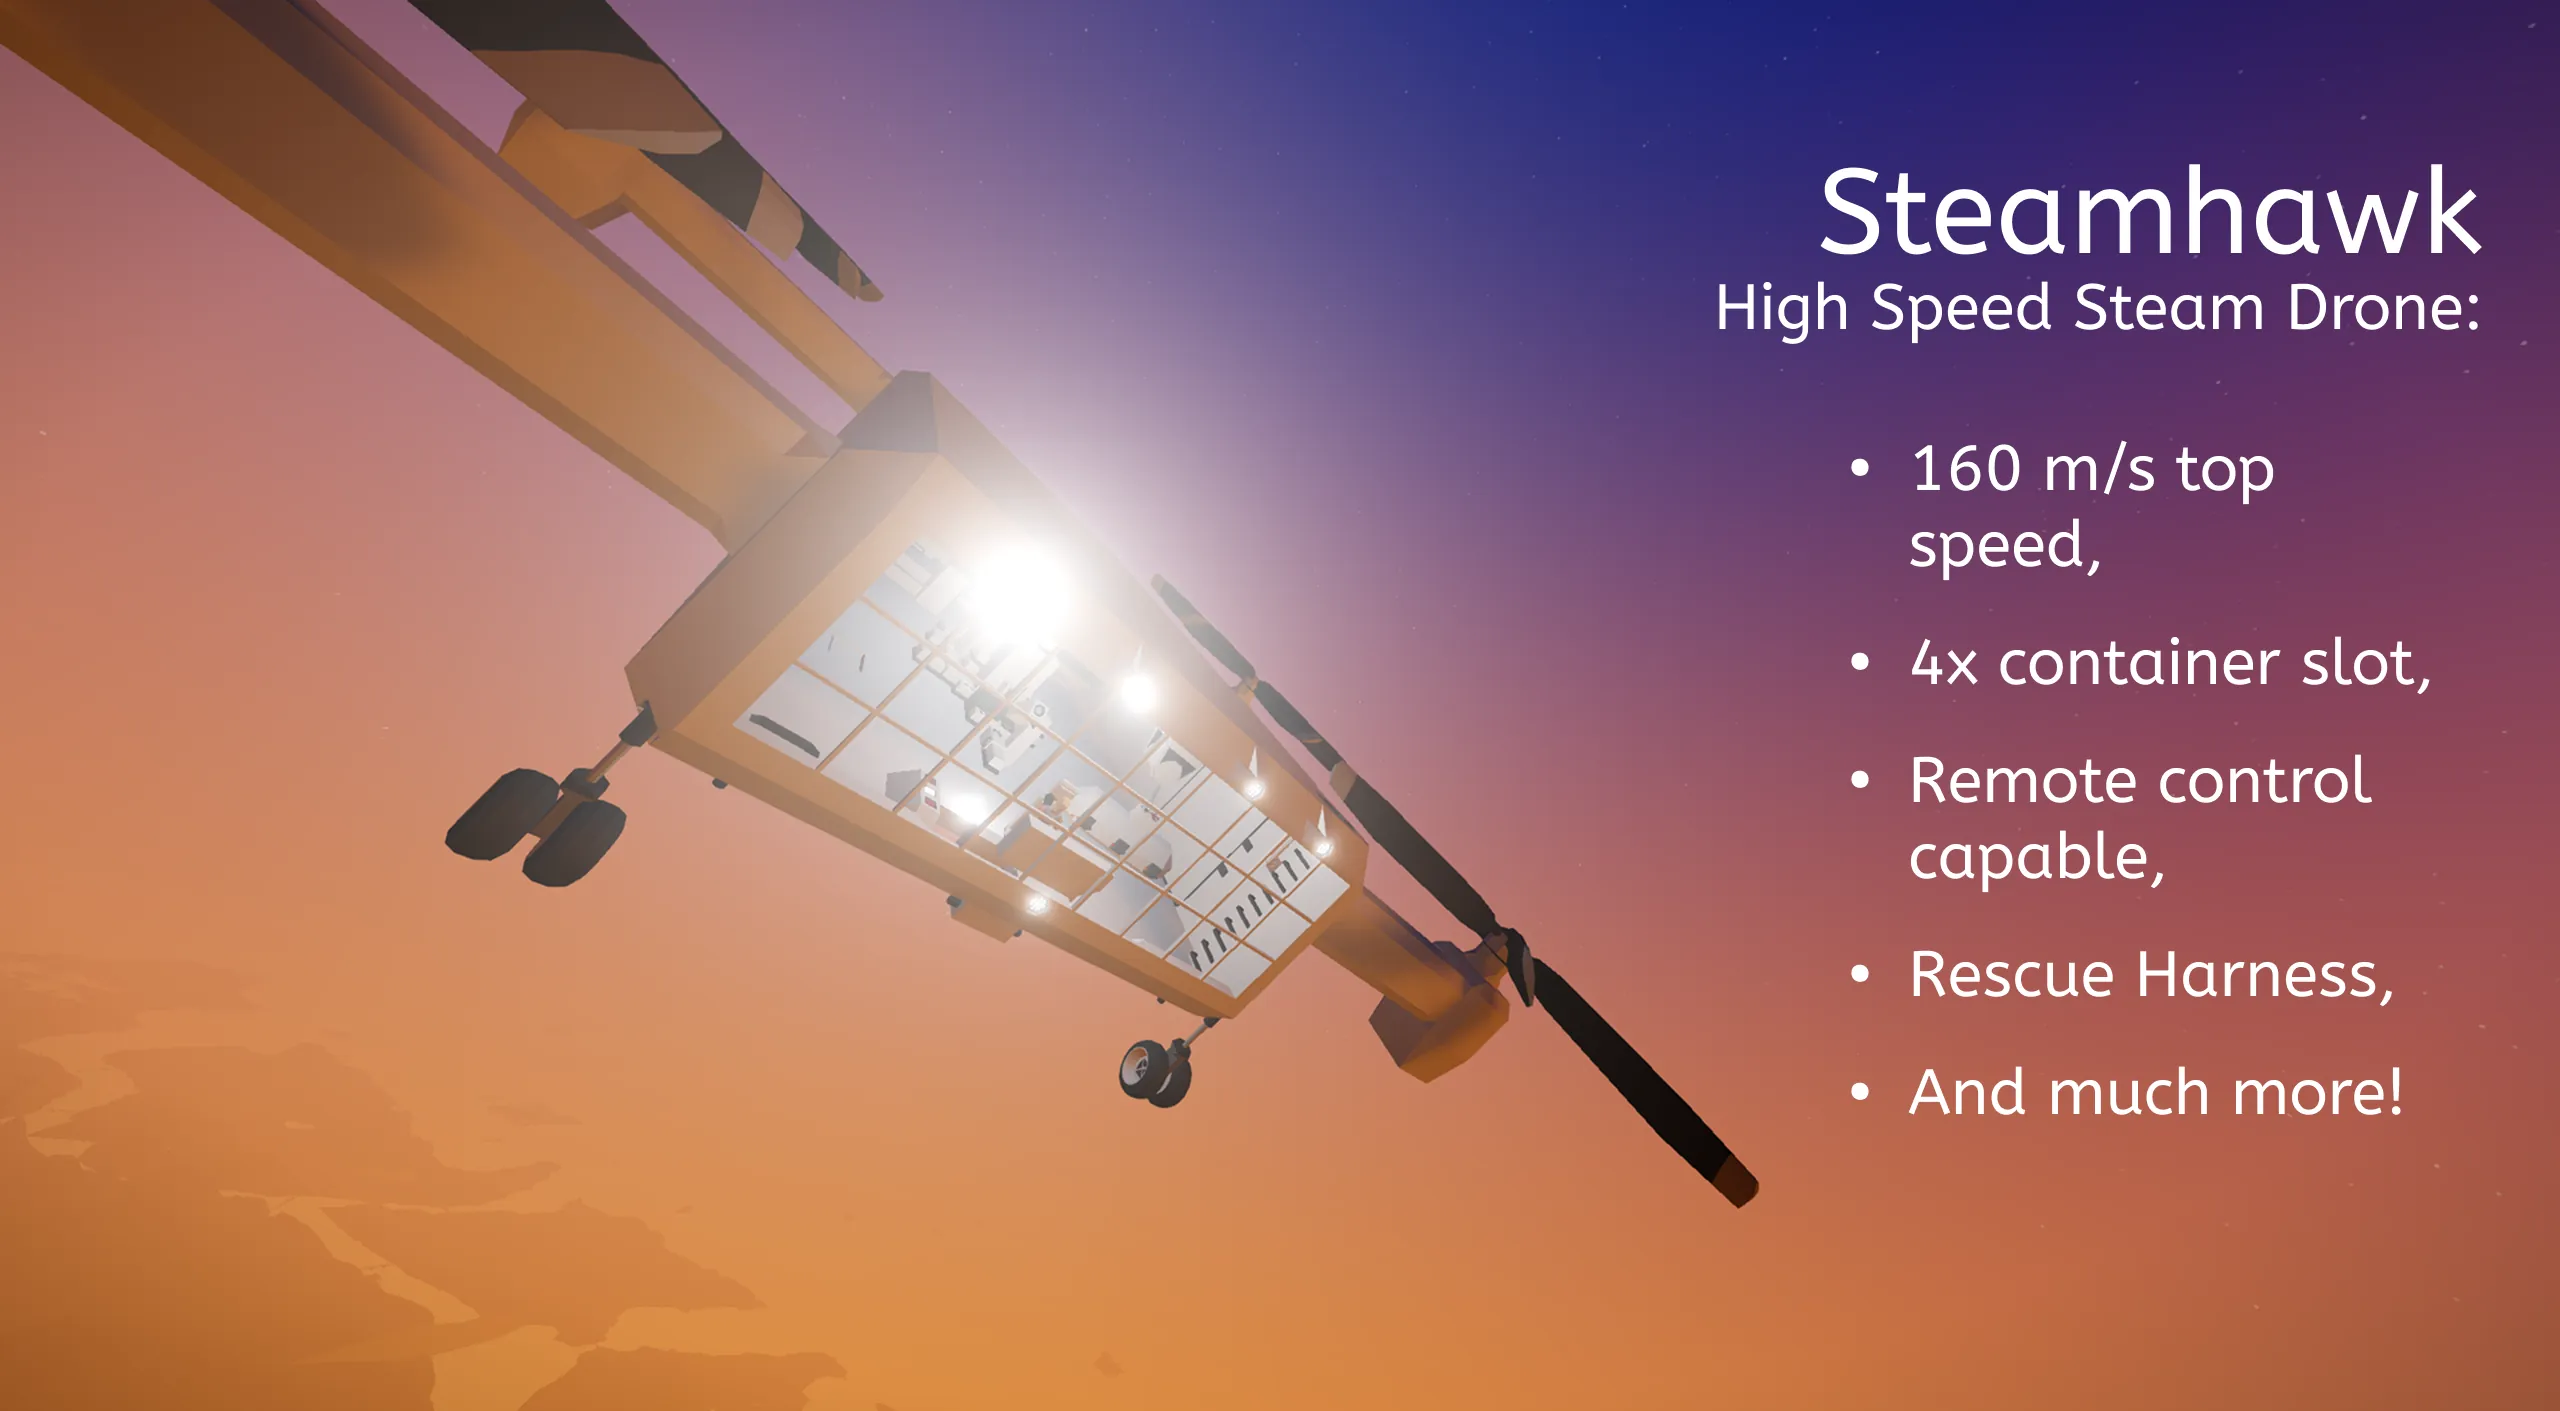
- Top Speed: ~160m/s
- Engine: Steam
- Range: Unlimited (Self-Replenishing)
Controls
I've made the controls simple to understand by default. But I documented every control below in case you still have trouble understanding it.
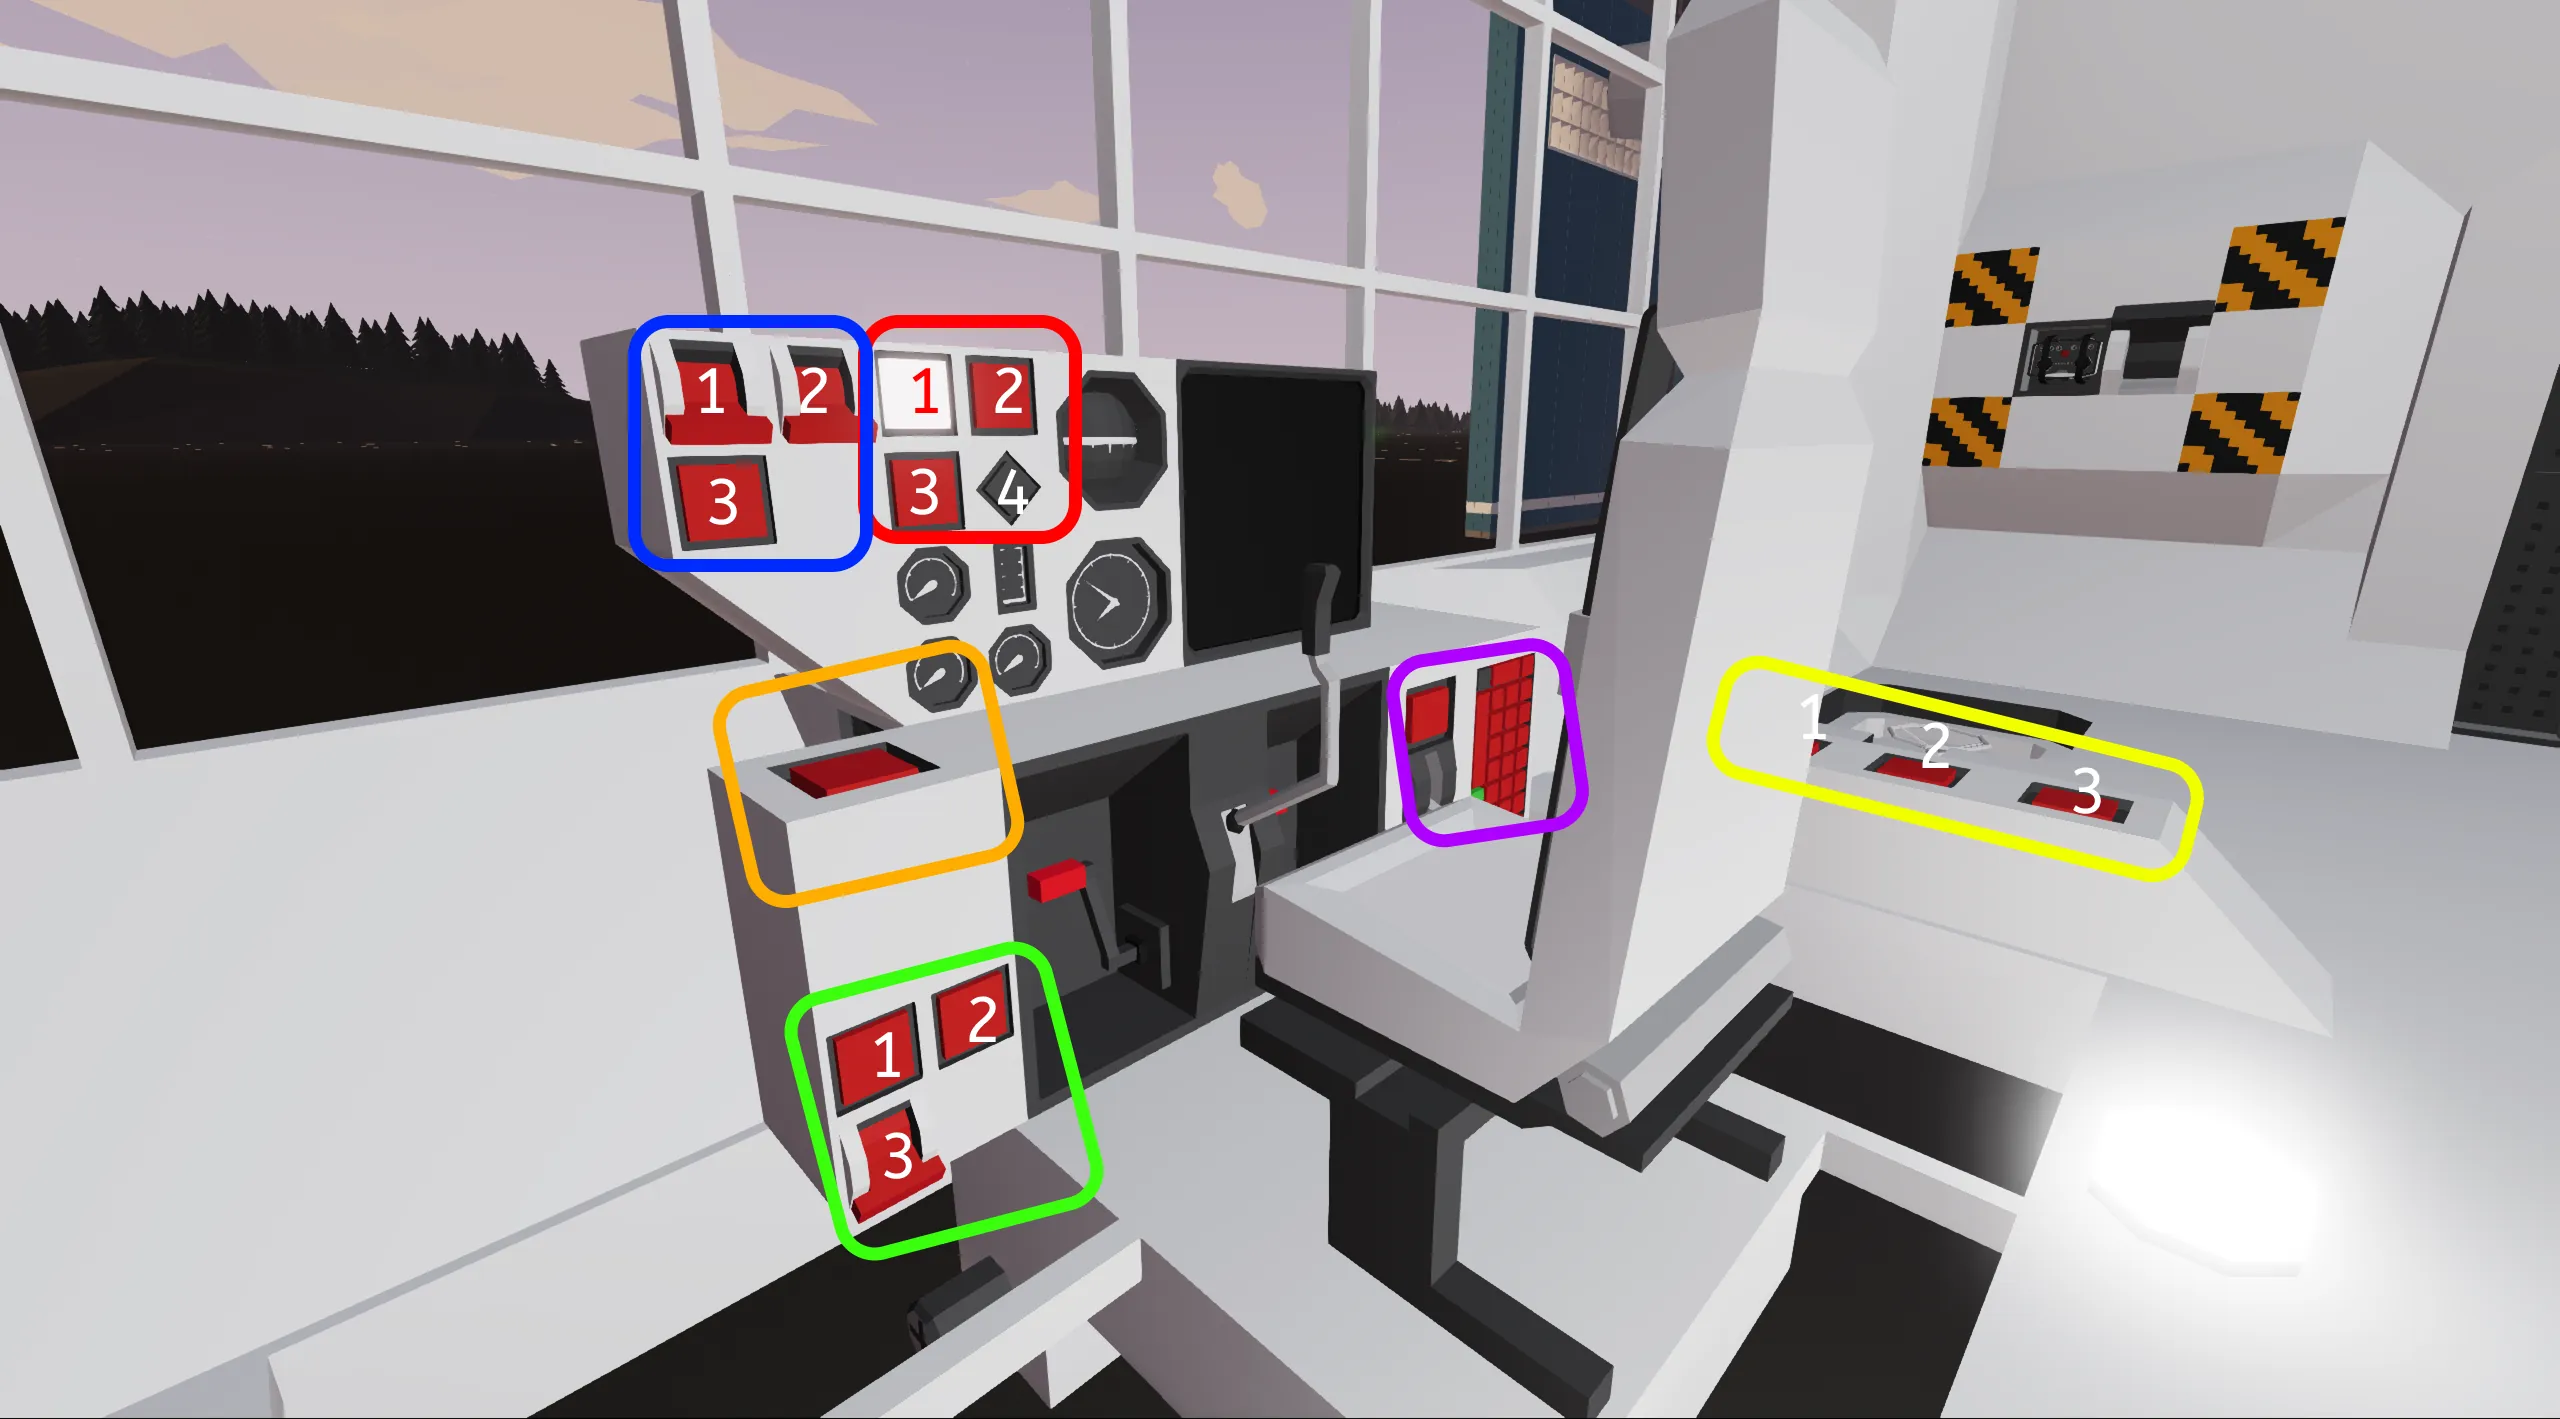
Blue
- 1: Turns on the GPS monitor.
- 2: Switches between GPS view modes. By default, It's in 'Free view' mode, toggling the switch will switch to 'Center player' mode. (Note: In 'Free view', you can control the map position using the touchscreen.)
- 3: Turns on the transponder. The pulses will appear on the screen as a big red circle.
Red
- 1: Indoor lightning. Self explanatory.
- 2: Toggles the spotlights located outside.
- 3: 100m System. (too long, explained below*)
- 4: '100m System' Indicator.
Orange
The 'Hover mode' button. This mode will turn on the 'Auto hover' function on the Gyroscope, alongside the wheel 'legs' will be extended. This can be controlled from the seat using the 'Trigger' keybind. Hover mode must be enabled to remote control the drone.
Green
- 1: Turns on the backlight on the instrument panels (where applicable).
- 2: Draws a green line between your position and your waypoint. This is useful, when you are trying to find the shortest path to your destination. (And to set your autopilot.)
- 3: The drones' wheels' brake are engaged.
Purple
- Throttle: It's basically your 'gas throttle'. It controls the overall power transferred to your propellers using a clutch.
- Keypad: Set your waypoint here.
Yellow (Autopilots)
Note: These are only to be used, when you are up in the air, and already heading in your desired position.
- 1: This system takes control over your pitch, trying to keep up the altitude the vehicle had in the moment you pressed the button. (Warning: The system has inaccuracies, It's suggested to fly above 1000m to avoid any crashes.)
- 2: This system takes control over your yaw, assuming the cockpit is facing downwards to the ocean. It corrects the vehicle yaw, avoiding 'clock-like' rotations on the vehicle. It's especially useful for the heading autopilot (and for you) to correct the direction you are going.
- 3: This system will keep you in the direction you were going when you pressed the button. Meaning, when you were going North (0.00000) and you press the button, the vehicle will keep going in that direction.
Features:
- *100m system:
This is a crash prevention system, that activates if the vehicle drops below 100 meters above sea level. It works the following way:
- If you tap the 'Reset 100m system' button, for 30 seconds, the system will not engage. For this time, the indicator light will be off, and you can use this time to fly up. Note that the system won't automatically kick in if you are on the surface. You must fly up to 150 meters up for the system to be armed fully.
- If the system is tripped, this system will immediately turn on hover mode, and a loud siren will bring attention to the driver. This will give you time to get the position back where you need to put it. If you are ready, you can press the 'Reset' button, and you can go on your way.
- Manual turn off: If you do not need this safestop feature, you can turn it off entirely. Press and hold the reset button for 1 second. This will completely pause the system, signalled by the blinking indicator . If you wish to turn it back on, press and hold again for 1 second. The Indicator will be off for the 30 seconds mentioned above.
Remote Control:
- This is an useful feature, when you need to precise out the drone's location, if you are outside the drone. (For example, need to get containers, rescue people, etc.)
How to use:
- There's a remote control unit next to the breaker for you to grab.
- The frequency to use on the controller is number 1.
- The vehicle utilises 5 "channels", with 1-4 controlling the winches in the following way:
- Press Hotkey 3 and Hotkey 4 to switch between channels.
- If browsing between channel 1-4, the nearest light to the selected winch group will flash. (Channel 5 will not flash at all.)
- Hotkey 1 raises the winch and hotkey 2 will lower them, if connected to a container. (Note: Due to not being able to customize Remote Control Units (yet), handle the controls as toggles.)
- Channel 5 is dedicated to the control of the vehicle itself. The controls are the same on the controller as the one up in the cockpit. Only difference is, that pressing the 'Trigger' hotkey will activate the Rescue Harness System:
Rescue Harness system:
- On the left side of the drone, upon activation, a door will open, and will drop 3 rescue harnesses down to the floor (Maximum 150 meters). You can reel the harnesses back up by sitting in the middle, red colored harness.
- A 4-button, color-coded instrument panel can be also found. Activating the button corresponding to the same colored winch group will send a signal to the electric connectors to release the connectors.
Thank you for subscribing!
And feel free to comment if you miss anything or just have a question!