This microcontroller displays information about your engines on the monitor. It is good because only the most necessary data about your vehicle is displayed on the monitor. I tried to make it as user-friendly as possible in the interface.
-------------
Functions:
--------------
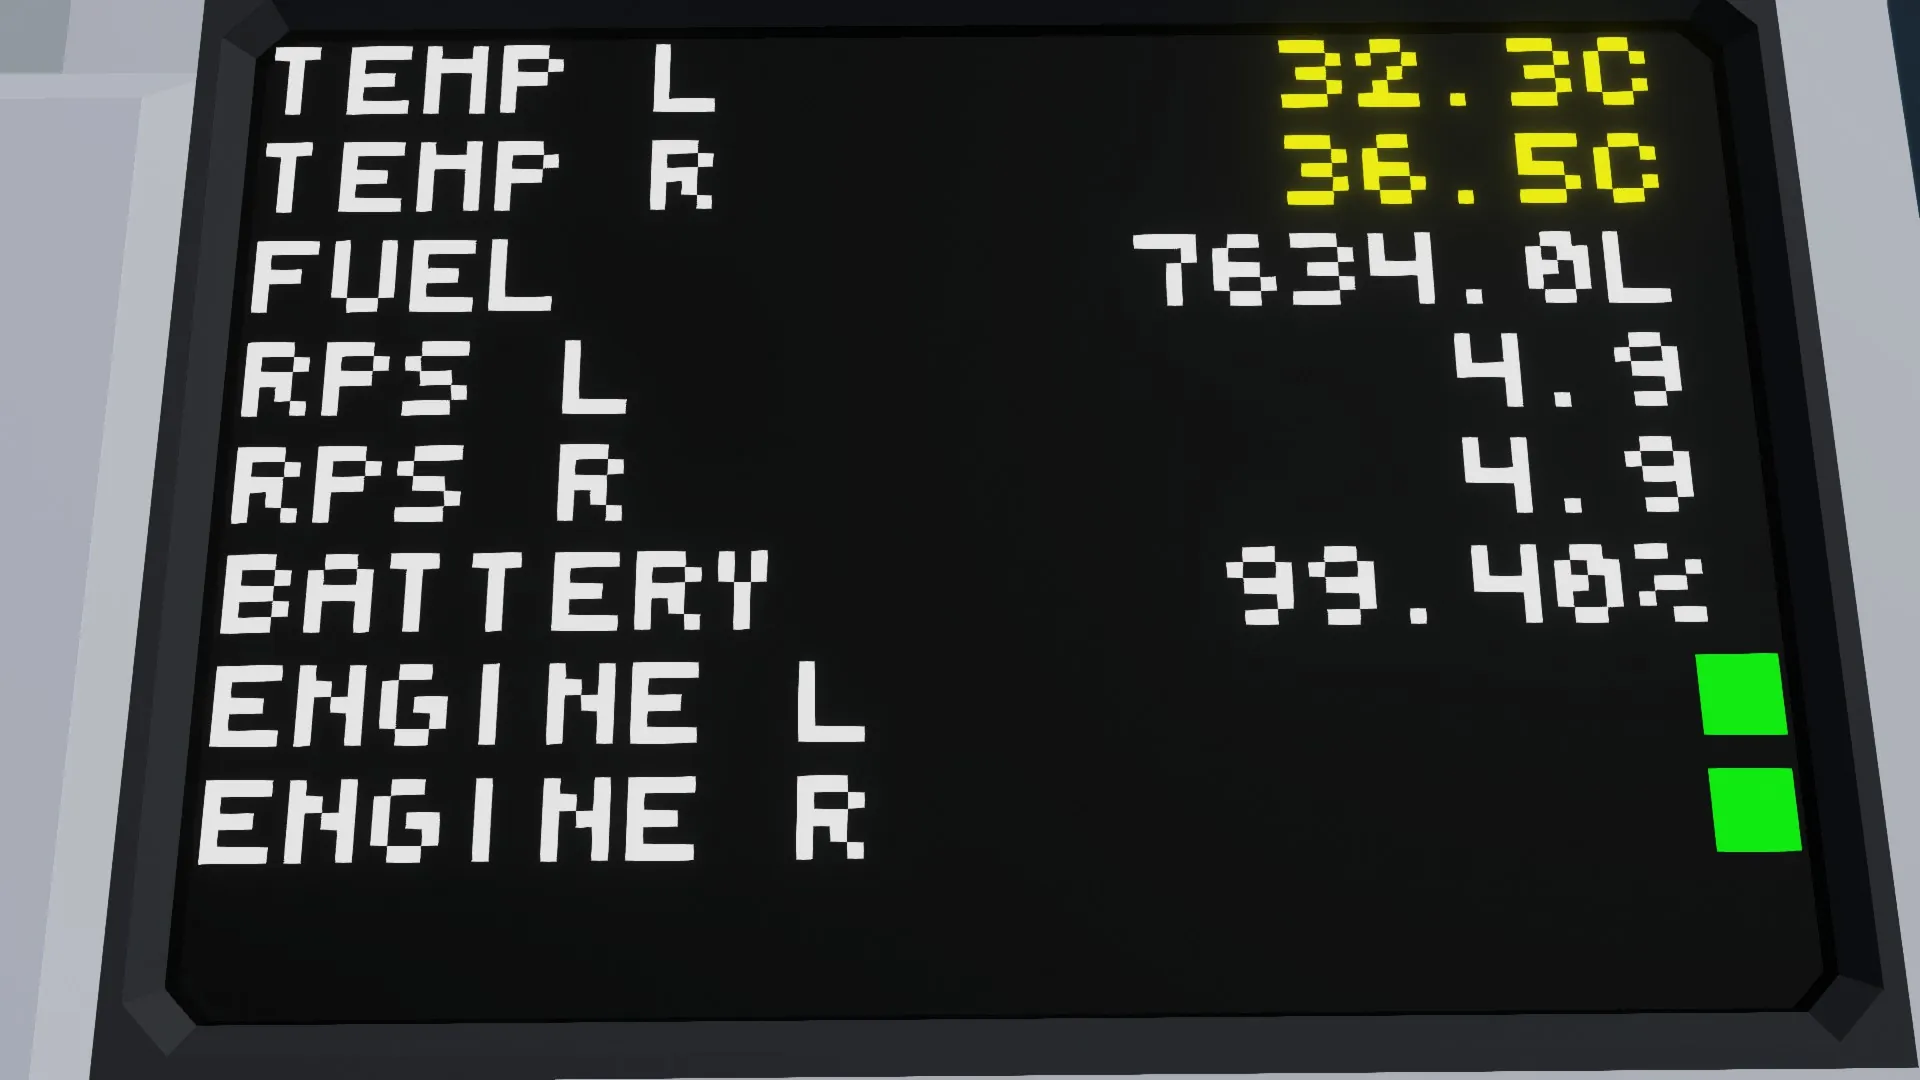
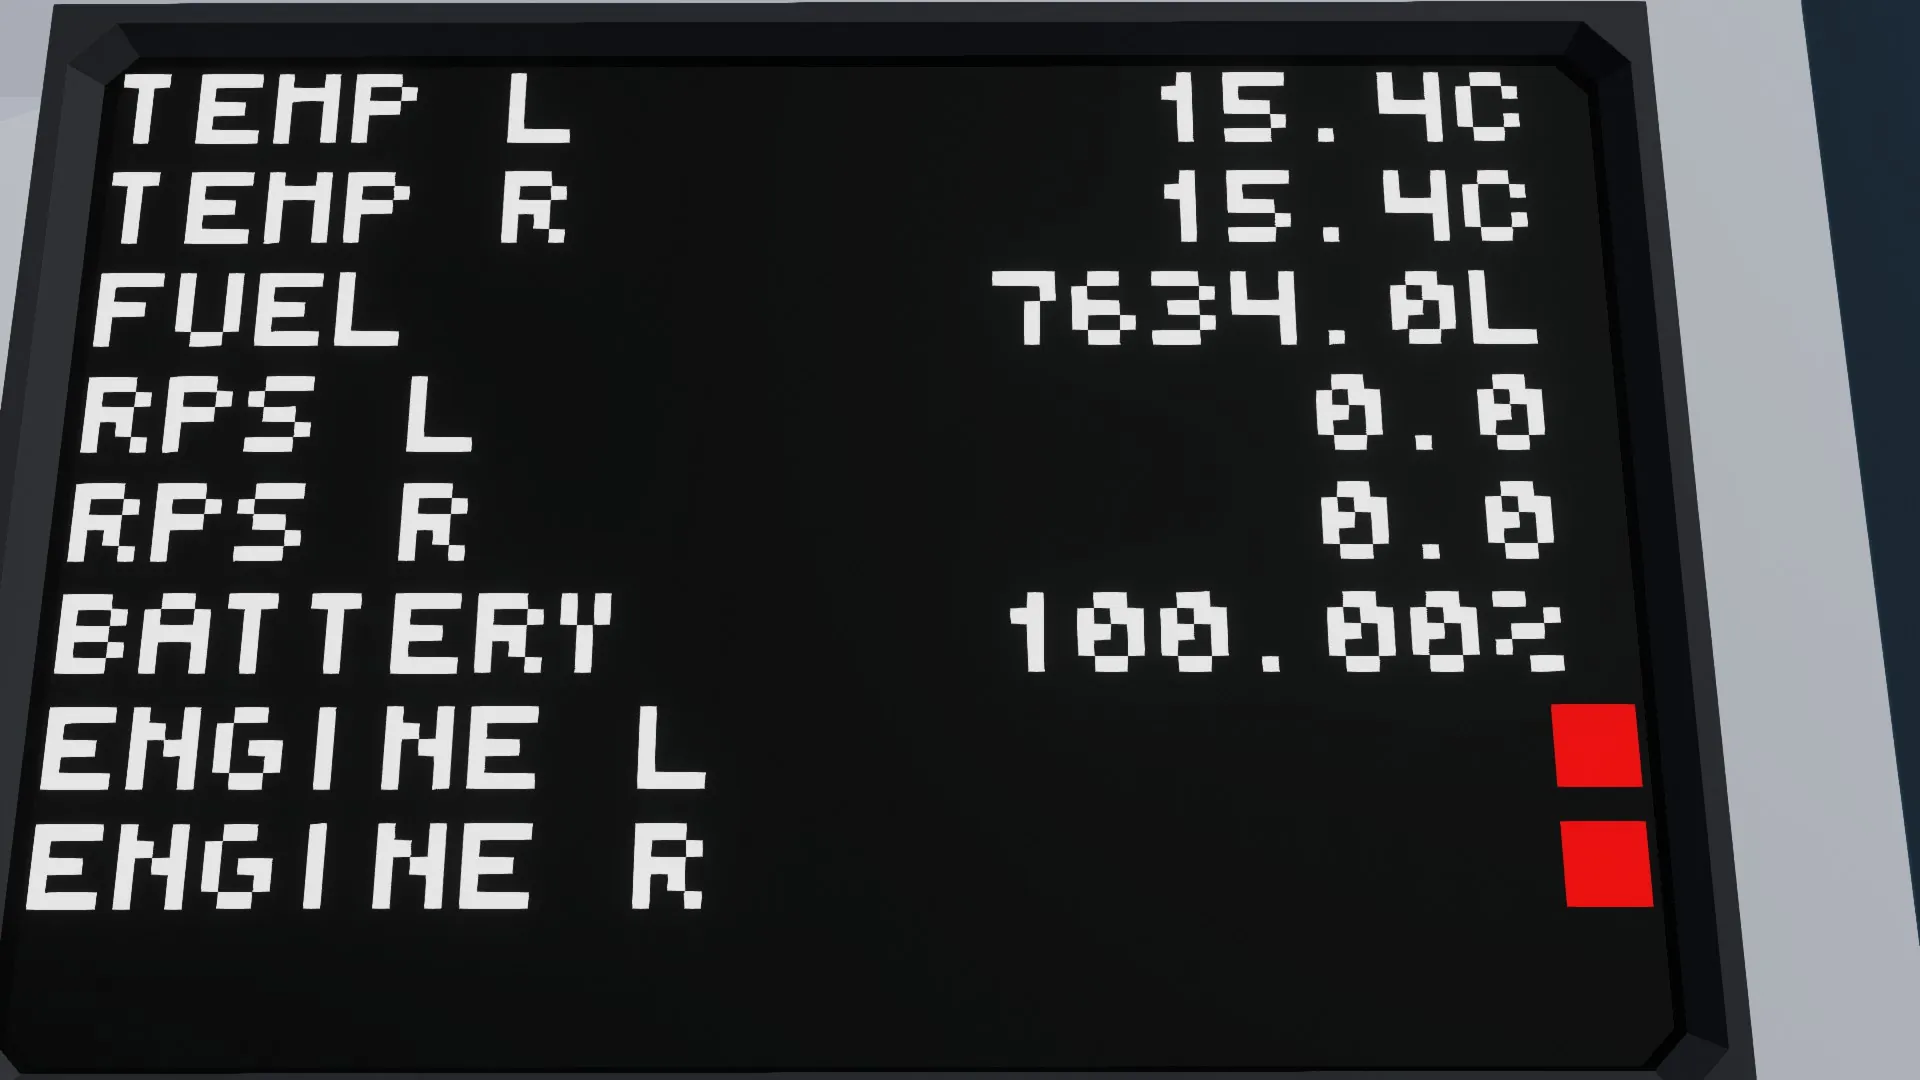
Now let's talk about what it displays.
1) Information about whether the engines are on using convenient indicators. If the red light is on, the engine is off or not working. If the green light is on, the engine is on and working stably.
2) The percentage of remaining electricity. Its color will also change depending on the amount of energy. If it is more convenient for you to view the value of electricity not as a percentage but as numbers from 0 to 1, then delete the constant number in the microcontroller.
3) The value of the RPS of each engine. In my opinion, it looks compact and cool.
4) The amount of fuel in the tank. The less fuel, the redder the indicator will be.
5) Engine temperature. The color of the text also depends on the temperature.
-----------------------
How to connect?
-----------------------
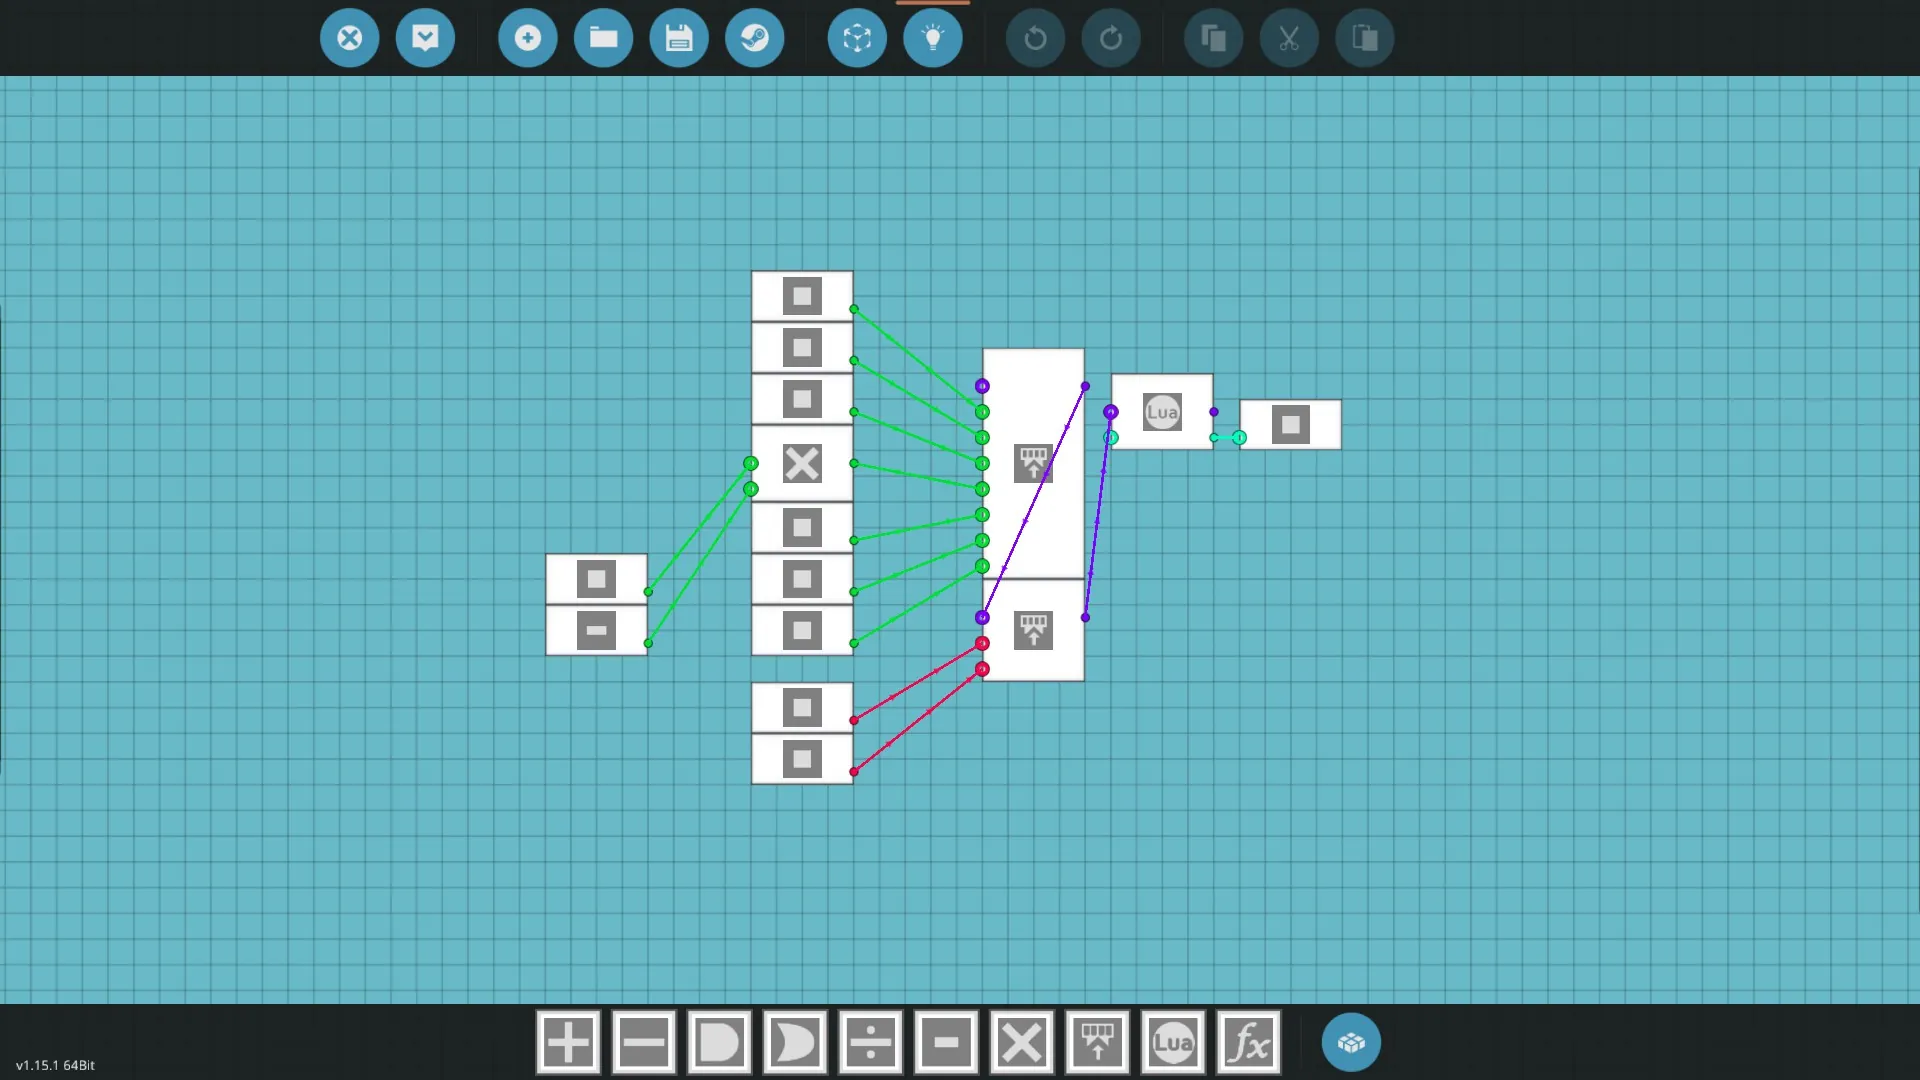
1) Place the microcontroller in a convenient place for you.
2) Connect Temperature L and Temperature R to the left and right engines, if you have only one, then connect any of them.
3) In the same way, connect RPS right and RPS left (if you have 1 engine, do the same as for the engine)
4.1) If you have a custom fuel tank (not one of the 3 presented in the game), then put a liquid meter in it and connect the liquid level to the liquid level, and the fluid capacity to the fluid capacity.
4.2) If you have one of the three fuel tanks presented in the game, then connect the content tank to the fluid capacity and liquid level. However, you will have some problems. Your fuel amount will be displayed correctly, but the fuel indicator will always be white. This is due to an error in the code, which is quite difficult to fix (it will be fixed soon). If this is not critical for you, then leave your tank. If not, install a custom fuel tank in your equipment and connect it (instructions in paragraph 4.1)
5) Connect the battery to the battery
6) Connect the left and right engines to the buttons responsible for the starters
7) Connect the video output to the monitor(the size is must be 2x3 or more)
----------------
Conclusion
----------------
If you have any questions or want to suggest any improvements, write in the comments. Enjoy!