Description:
The NFPA (National Fire Protection Association) created NFPA 1900, the standard for emergency response vehicles, in 1914. This outlined the minimum requirements for a variety of emergency vehicles including but not limited to, the type one fire engine. The truck you find posted here is my iteration of a basic, type one fire/rescue fire engine. Meeting all the minimum requirements of the NFPA including, an 800 gallon water tank, a 1500 gallon per minute pump, and all the basic rescue tools to help prevent the loss of life on the fire ground. Though not based on one specific brand of fire engine, this vehicle takes inspiration from HME’s Ahrens fox fire engines, Pierce’s Enforcer series, and E-One’s rural urban interface type 1 fire engines.
_______________________________________________________________
Pump Operations:
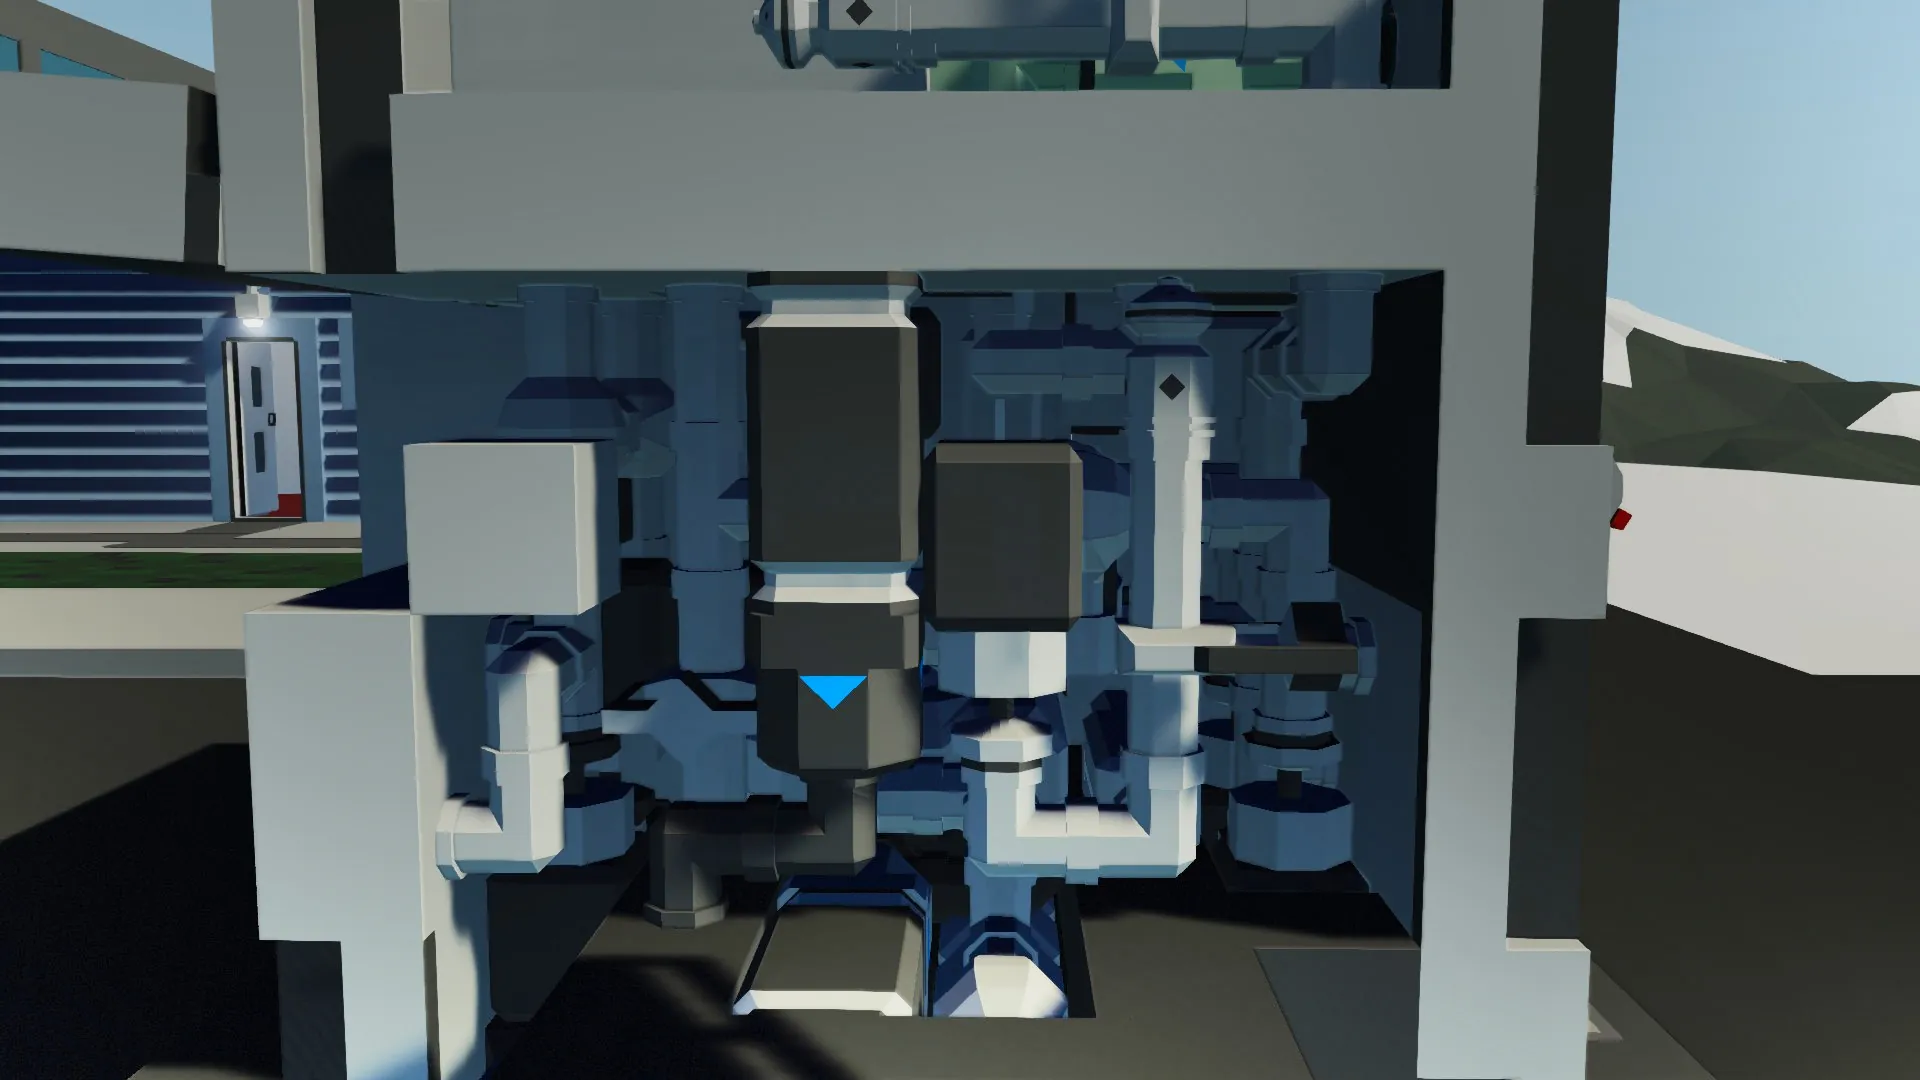
Pump Panel: Photo #1
[img]https://image2url.com/images/1765166513692-b9b38655-ae87-4d05-af1e-faf3b57da59b.jpg[/img] PTO controls: Photo #2
[img]https://image2url.com/images/1765166590947-9a3cf255-d8e3-4f54-9c3d-9d28319270ee.jpg[/img]
I designed this truck with the best of my knowledge of a genuine PTO driver fire engine impeller pump. The most basic thing you need to know how to do is engage the pump.
Basic Operations:
1. Ensure the truck is powered on (Battery switch near the driver left foot) running (Ignition flipped on and started using
the starter button) and the parking brake engaged (Parking brake button off)
Located to the left of the steering column is a button labeled (Engage Pump) and press it ensuring the light in front of
it is illuminated. The engine jumps from an idle of 600 rpm to approximately 720 rpm.
2. Go to the pump panel and enable the pump located to the left of the tank fill indicator (little rainbow thingy) the pump
should then gain pressure.
3. You can then select any one of the discharges to enable and they will have pressure behind them. There are 2 Small
Diameter (limited pressure) discharges and 1 intake on the pump panel, another intake is located on the rear of the
engine along with a large diameter (unlimited pressure) discharge. On the right side of the engine there is a further 3
discharges, 2 small diameter and 1 large.
_ _ _ _ _ _ _ _ _ _ _ _ _ _ _ _ _ _ _ _ _ _ _ _ _ _ _ _ _ _ _ _ _ _ _ _ _ _ _ _ _ _ _ _ _ _
Advanced operations:
To operate the truck without using the in built water tank you must have another pressurized water source feeding into one of the two intakes, and the tank to pump closed.
1. Filling the tank can be done in two ways, pressurized filling and drafting. Drafting can be used to suck water up from
an open water source (lake or sea) to fill the water tank, do note this can take some time (up to 15 minutes) to fill the
tank all the way. The drafting tool is located in the engineers compartment (directly next to the primary pump panel)
and to fill with drafting you must throw the tool into an open water source, connect to an open intake, and the tank fill
valve be opened. Pressurized filling requires that the tank fill valve be open, and a pressurized water source
connected to an open intake. The tank fill valve is located on the farthest right on the line of switches on the pump
panel.
_______________________________________________________________
Operation:
1. To start the truck, ensure the battery switch (located on the drivers left foot), and ignition switch (located to the right
of the steering column) are enabled before pressing the starter to get the truck running.
2. The Parking brake is preset to be on, so pressing the parking brake button (located on the right of the dashboard)
will disable it allowing the truck to roll forward.
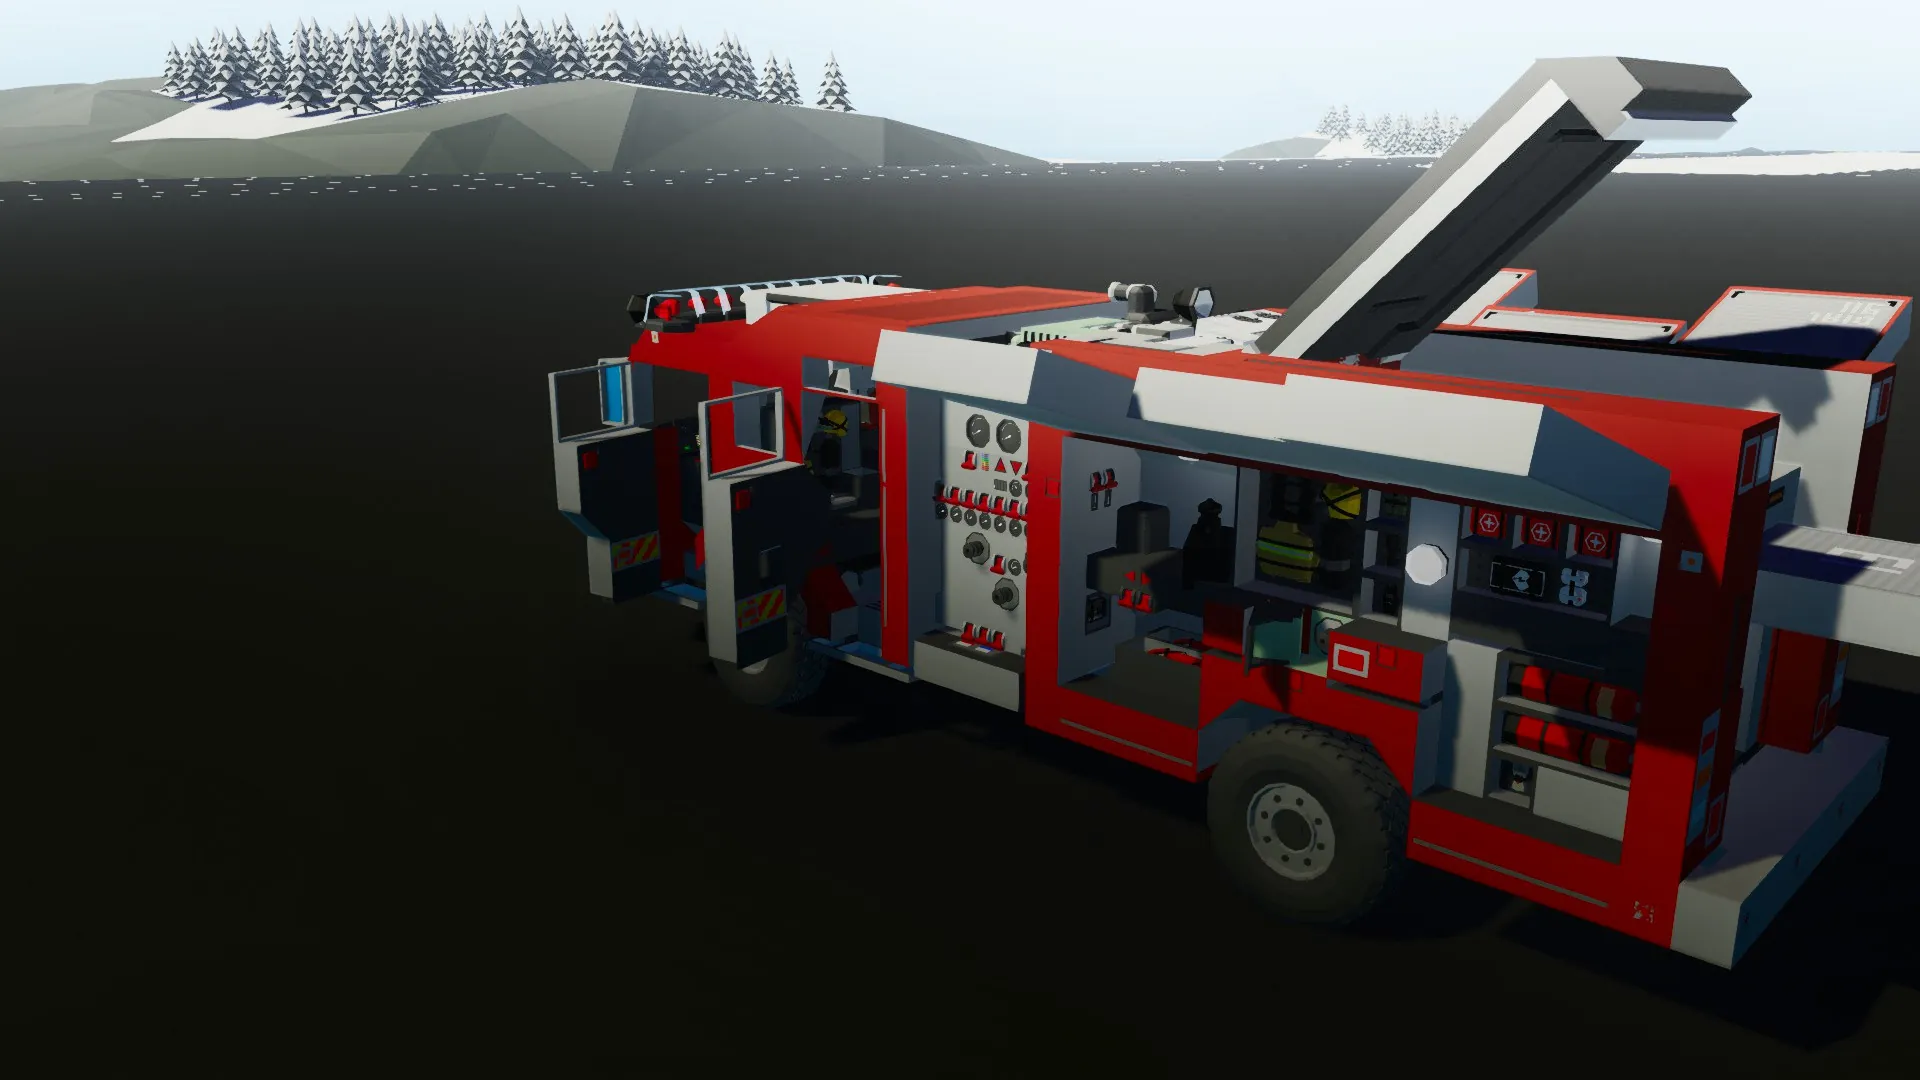
3. Shore power is located directly behind the driver door and the fuel cap is directly above the left rear tire.
[img]https://image2url.com/images/1765225685973-0cf77647-f1c5-405b-8d0b-13c90448c711.jpg[/img]
4. Note that without the generator active the truck will drain power slowly, to enable the generator, the truck must be
running and the generator light on (by pressing the button, 2nd to the right on the center console).
5. To operate the roof mounted scene light the truck must be on and the generator activated.
[img]https://image2url.com/images/1765225751545-1bbcb8e8-8b39-453c-90bd-dee71d86e5e4.jpg[/img]
_ _ _ _ _ _ _ _ _ _ _ _ _ _ _ _ _ _ _ _ _ _ _ _ _ _ _ _ _ _ _ _ _ _ _ _ _ _ _ _ _ _ _ _ _ _
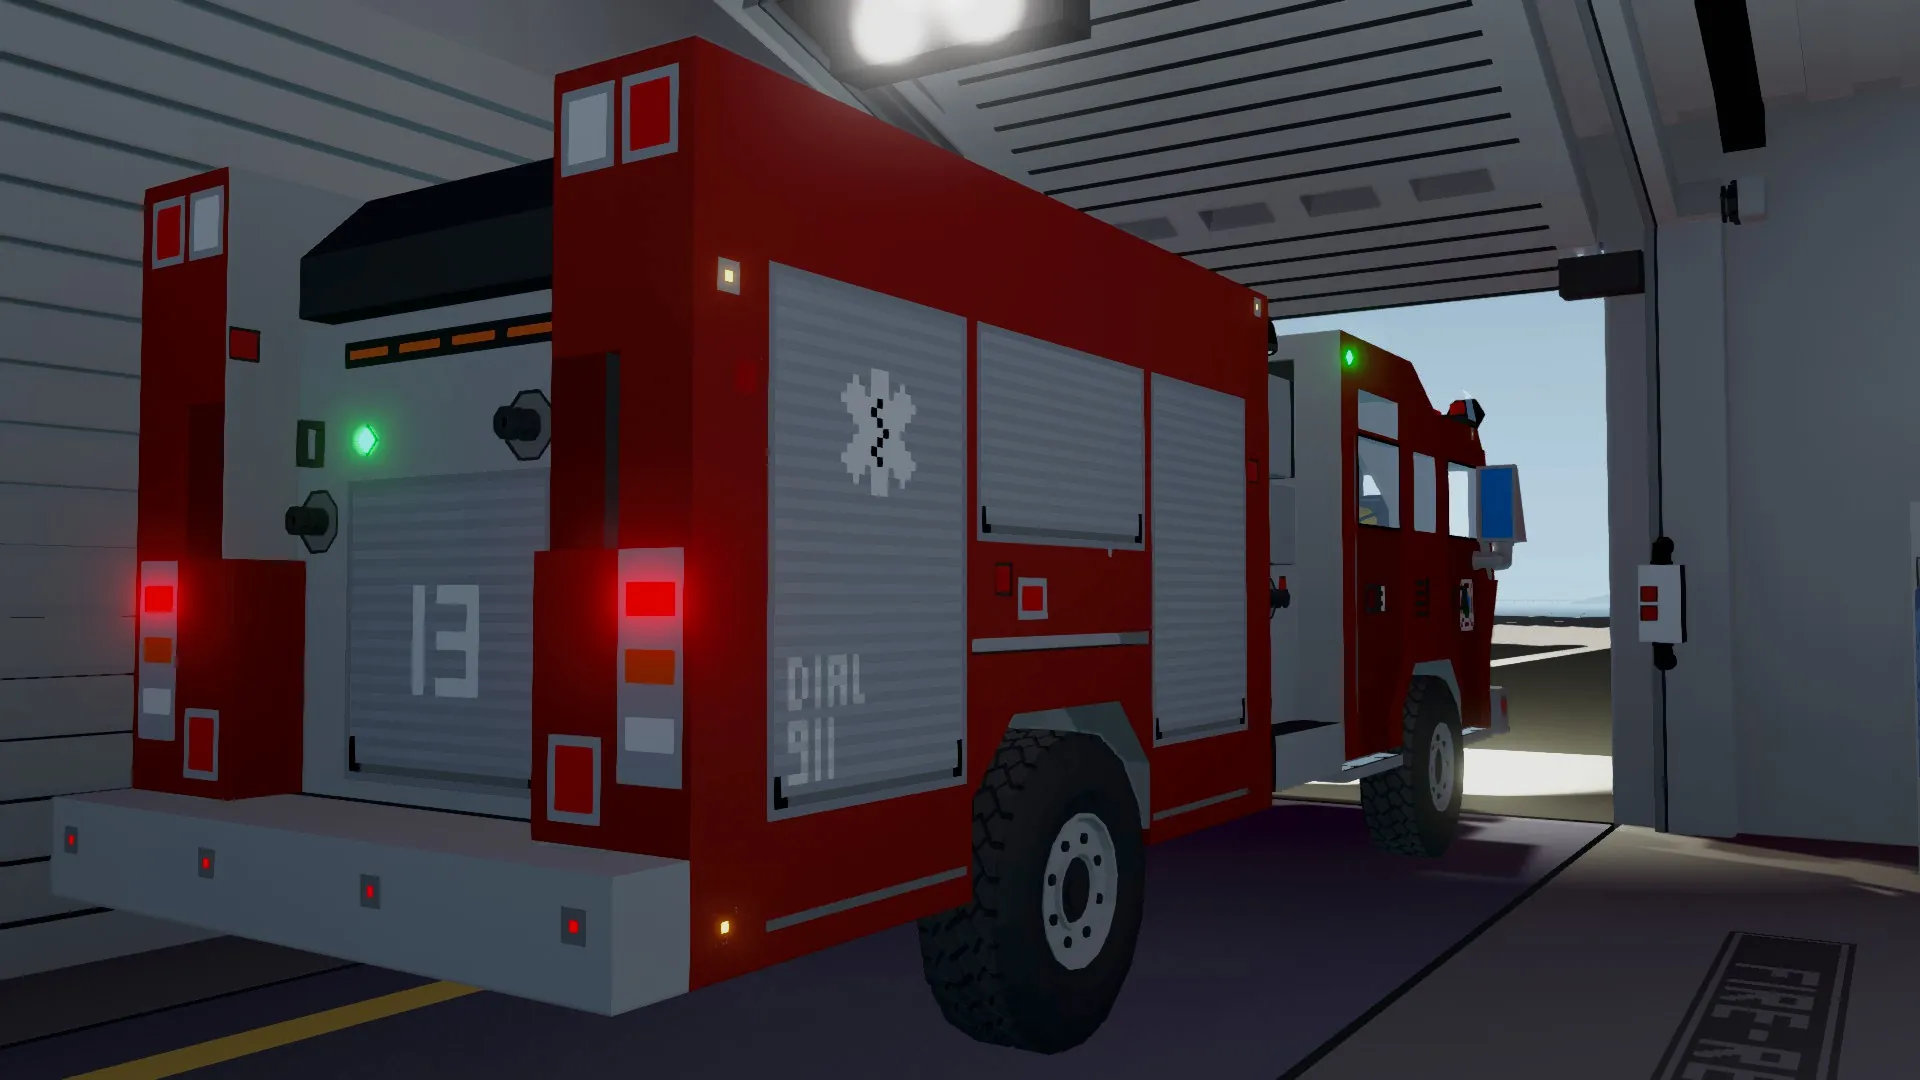
Emergency Operation:
1. First, the emergency lights can be enabled by pressing the Master Warning button located farthest to the left on the
center console.
[img]https://image2url.com/images/1765225876499-74089736-4e36-4ddb-bb7d-4fface086e8c.jpg[/img]
2. Electronic sirens are located under the driver's right arm on the center console and come in four modes, Wail (T1),
Yelp (T2), Piercer (T3), and Hi-Lo, (T4).
3. A mechanical or Q siren is hooked to the number 3 hotkey on the driver's seat along with an air horn hooked to the
spacebar button.
4. The white flashing light on the center of the lightbar can be disabled by pressing its indicated button on the center
console (3rd to the right.)
_______________________________________________________________
Hotkey controls:
W/S: Throttle
A/D: Steering
1: Headlights, press once for low beams, twice for high beams, and a third time to disable.
2: Reverse
3: Federal Q